Posts tagged power
3D Storytelling 2012
3D Storytelling is one of the biggest events of the year at Ravensbourne. The event is totally different from any other that is run within Ravensbourne as it is headed up by the events team and is run by a select group of students. This year Russell Fleming and Myself took on all of the events logistics and rigging with Tom Glover creating the lighting design. The event features around the fact that there is a RealD Projector in the walker space that allows speakers from different companies to show off there work to the rest of the 3D television and film industry. This gives the students a platform to network with people form within industry as nearly 1000 delegates turn up across the 2 day event.
My role for 3D storytelling was as head of rigging and logistics, Russell was head of event technology and logistics, both of us have these roles for Ravensbourne 2012. The main rigging requirements for this event were to light the walker space for the keynote speeches, light the building to give it a different look and feel and put power distribution on the 4th floor for the exhibition.
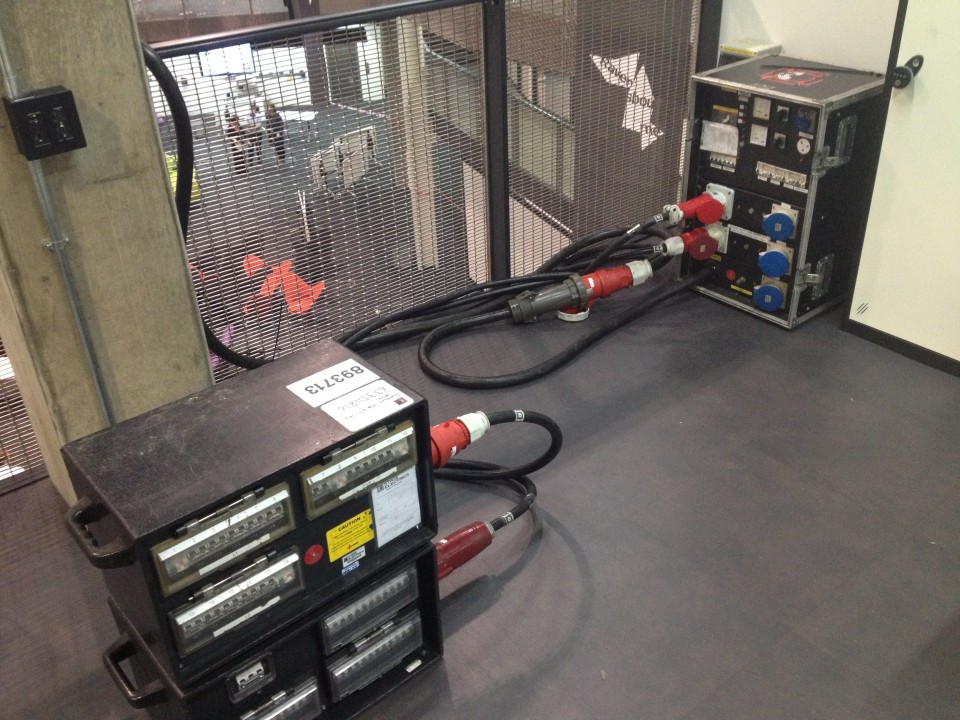
To start with I worked out the power requirements for the exhibition going off a floor plan with 22 stalls on it. This time I decided to use the 125 Amp 3Phase on level 5 and split it down to 2 63 Amp 3Phase’s as we had some high power lights for the architectural lighting. The distro’s that we went with were 125A 3P to 2 x 63A 3P and 2 x 63A 3P to 18 x 16A. This meant that I had more than enough outputs for all of the lighting requirements and if all of the stalls were used. We also made the decision to cut the 4 way extensions down to 2 as it was felt that they only need 2 sockets per stall.
For the lighting side of the rigging Tom had asked for 4 city colour washes to go on level 7 and 4 to go on level 4 along with 2 Clay Paky 1200 spots to go at each location. The Clay Paky’s on level 7 had to be hung to get good coverage on the wall. Originally I wanted to hang them off a truss rigged to the RSJ’s above level 9 but as we did not have a load testing certificate to say what load they could take health and safety did not like the idea. I then decided to put them on 2 wind up stands on the 7th floor. The lighting for the main atrium was originally going to go on the 4th floor but was deemed to be in the fire lane and had to be moved when once it had been put in place. We had to move it to the 1st floor/Mezz which actually created some nicer angles and gave a really nice look on the final night when the networking was taking place in the welcome space. All of these lights were sitting on 3ft high deck so that the metal grill under the railing did not get in the way.
In the walker space we felt that we had to do something different from what had been done before in that space. We ended up dead hanging a scaff bar and putting par cans up for a wash of colour along with source 4’s with gobo break ups in them, for once no movers were used. This all ran of the house dimmer pack saving a lot of money and time.
The biggest challenge that Russell and myself had in the planning stage of this event was where to put a Telegenic OB truck. This is a major problem as the outside of Ravensbourne is not designed to have a truck of this size sitting there for over 2 days. This caused major problems right up until the last minute as every location that we chose there was something causing a problem. In the end we got parked it down the side of Rave. I feel proud at the amount of contacts that Russell and myself made out of this event, some of which involved people that generally students don’t even know about. I also made sure that I did not make the same mistakes that I made at penrose market. The logistics generally ran very smoothly with no major problems. This is due to the time and care that Russell and myself put in and the communication with the management of the event. I have to give a big thank you to the second rigging team as they managed to gel over 250 florescent lights around Rave to change the colour of the building.

SeeIT
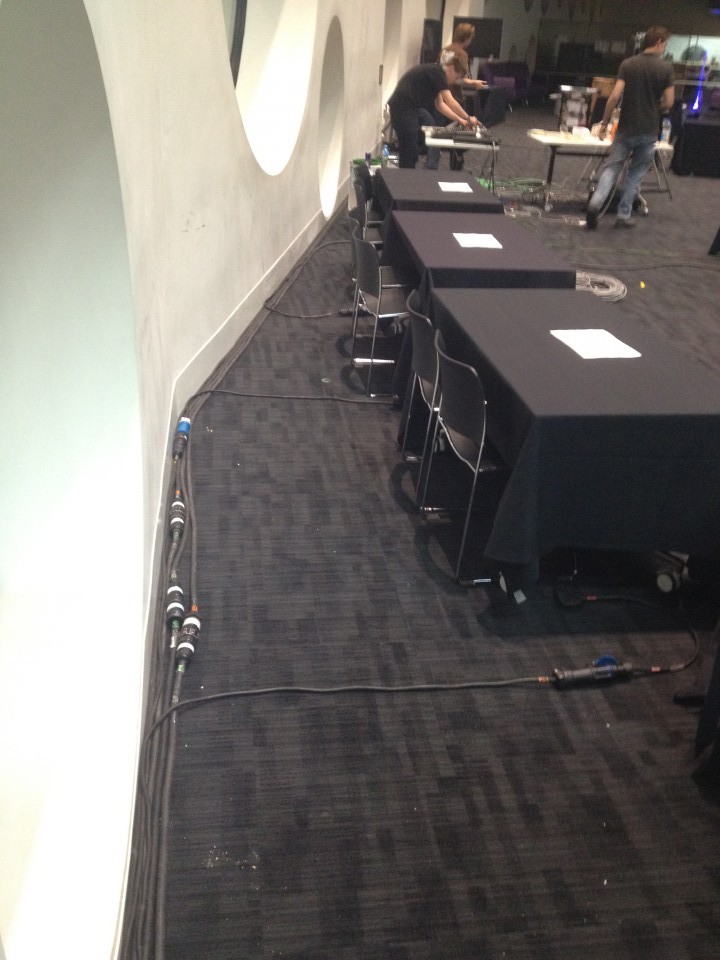
Today we are providing power for a small (25 stall) event at Ravensbourne on Level 4. For this event we were asked to provide power for 30 stalls and a few lights, all requiring hot power. Each stall was provided with 2 x 13A socket with enough power to run a couple of TV’s and Laptop’s each up to a maximum of 16amp’s per stall.
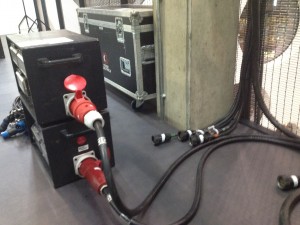
The events main supply was from a single 125A 3ph which was then split down to two 63A 3ph supplies, before being split down to individually protected 16amp circuits for each stall. This gave us plenty of protection against overloads as well as surges and faults. The system has fault protection at 3 levels before it tripped out the whole event, each 16A feed has its own RCD, each group of 18, 16A sockets had there own 63A 3ph MCB protection and the whole event had 125A 3ph RCD and MCB protection at supply and in distribution.
The bulk of the event was cabled using 6 way 2.5mm SOCA with Fan in’s and fan outs at each end, this provided an easy rig and de rig with only 6 SOCA’s being run out to the required locations, and only 3m and 5m 16A extensions to provide final distribution from the fan outs.
Each stall could pull up to 16A with out tripping the individual circuit , but if all 25 had pulled the full 16A, they would have tripped out the incoming breakers as the supply is only protected at 125A 3PH, but 25 stalls all at maximum load would pull 133.3A per phase. Due to the fact that most stall’s were only running a laptop and possibly a tv or small projector, this limit will never be reached, even if a few stalls do draw the maximum available.
During the event today we took some current readings on our main distro and each phase was so low it was unreadable on the meter and the meter’s range was from 50A to 200A.
Today also used the exact kit we have specified for the upcoming 3D Storytelling Conference in late March, and provided a useful insight into any problems we may come across when we rig the next event, in the same space.
Photos after the break:
Penrose Market 2011
For Penrose Market I was allocated the job role of head rigger. The tasks that I was to undertake in this role was to come up with a power plan for both the market on the ground floor and on level 4 of Ravensbourne. The reasoning behind doing this, even though there is already plenty of power in the floor boxes, is to make sure that there are enough power sockets for each stall and to give us greater control over the power that is being used on each phase of electricity.
When I was given the original list of the power requirements from Russell I nearly jumped out of my skin, as there was 103 stalls that required power across both the ground and 4th floor. This was going to be the biggest power distribution system I have every designed. To start with I need to work out what power was required on which floor, this meant going through all of the original requirements that Russell had put together and working out where each stall was placed on the floor plans. I worked out that there was 30 stalls on level 4 and 73 on level 0 requiring power. I then looked at the best distribution system for the 2 locations and made the choice to use the 63 Amp 3 phase on level 7 to power level 4 and the 125 Amp 3 phase that is in the OB point out the back of the walker space to power level 0.
My original concept for level 4 was to have a short cable going from the socket to the distro and then use soca to run the distance down the side of the balcony to the stalls on the 4th floor. In the end I decided against this as it was going to massively increase the cost of soca and getting a longer length of 63 amp cable was working out much cheaper. This also meant less mess of cables on the 4th floor and a quicker rig time, as we only had to drop 1 cable over the balcony from level 7 to 4. Level 0 kept to the original design as I had to run at least 10M of 125 Amp 3 phase cable from the OB just to get to the back door of the walker space.
The distro that I decided to go with for the 4th floor was 63A 3Phase to 18 x 13A/15A and 16A sockets. This was chosen as each output of 13A/15A/16A all have a 16A RCOB protecting the users. As I had decided to put the distro on the 4th floor, it was not really necessary to use soca as the distances were short. This meant just running 16A out to each location with a 4 way extension on the end. To make up the 30 stalls I had to work out the load calculations for each stall and put the smallest power consumers on 16A splitters, most of the stalls were just running laptops or monitors in the end so the power draw is very minimal. For the walker space I chose to use a similar distro 125A 3Phase to 36 x 13A/15A/16A sockets. This also has 16A RCOB’s protecting each group of outlets. For the longer runs out into the welcome space on level 0 I planned to use soca for this as it made life much easier to rig and de-rig. In close proximity to the distro I just planned to patch straight into the distro.
The main issue that I had during the planning stage of this event was the budget. The engineers in total only had £2500 to spend and just for power distribution I needed nearly £1500 in the end. I do feel after doing this event that I can come up with a better distribution design that will come in rather cheaper and be much less cluttered than the one that I created for Penrose.
On the actual rig day there were rather quite a lot of issues that I need to address for next time. I felt that as this was my first main event where I was the boss I should have been a bit louder and told people where to be and what to do as things were not getting done quick enough. The 4th floor should have only taken a couple of hours to rig with the amount of crew that I had, but it took most of the day. I had also made an amateur mistake in not double checking the hire quote against what I had asked for as not all of the cable that I had requested was on the quote and did not turn up. I ended up having to go to stage electrics to pick up more. I had also made the silly mistake of trying to do too much in taking on a nightshift at my part time job and running the rigging during the day. I had to leave at 8.30pm and we had barley started the ground floor power, I should have been there. This meant that the following day I was in bed resting while my team did all of the snagging. I was there for the de-rig however and that we managed to do in about an hour which was not bad going.
Stickaid 2011
0This weekend has been a very long yet fun weekend working on Stickaid 2011 with SilverLine Media, at Ravensbourne University, North Greenwich. Stickaid is a 24 hour broadcast streamed live onto Stickam.com and Youtube.com and this year it came from Ravensbourne, with the help of SilverLine providing the stream and many Ravensbourne students filling rolls from Camera Operators to Sound Supervisors to Editing and many more. The students that helped out over the weekend came from all year groups with some only 3 day’s into there courses.
Scott and Russell from Fluxity were originally brought in on Thursday and Friday to rig the events lighting and power. This job turned out to be over complicated due to some poor planning and communication from all parties involved. The rig should have taken only 8-10hours to complete but had to be completely re-worked to overcome the lack of correct power and distribution.
At 5pm on Friday afternoon Tom also joined the frustrated rigging team to assist in finalising some decisions and to get the rig moving again. The rig was finally completed at approximately 11.45pm on the Friday, with only a quick focus and program to be completed in the two hours before the 12Midday Broadcast start. Programming was completed during the first couple of hours of broadcast by Charlie Fox and Scott.
Fluxity Lighting was kept on call during the event for power and other related problems, and we are very pleased to report that we didn’t receive a single call, and the system was stable and survived the full 24hours.
Scott, Tom and Russell turned up at about 11am on Sunday for the De-rig that was due to begin at about 12.15pm. Between the three of us we had all of the lighting power and staging out of the rig and Ravensbourne back to how it was, in just under 6 hours, in a very relaxed yet steady de-rig.
All in all a long weekend in which we helped raise over £17000 for Unicef. It’s not too late to Donate still, just click on the logo above.
Here’s what Elliot from SilverLine Media had to say about working with Fluxity, over this last weekend:
Scott, Russell and in the end Tom, helped us Thursday, Friday and when I honestly thought that we weren’t going to have the lights going or anything, 2 hrs before TX they made it all happen. Thank you so much guys, especially for dealing so well with my screw ups and then the de-rig on Sunday!
SCREENSAVER: 3D Cube Webcam
0Over the past couple of day’s I have been playing around with Xcode and Quartz Composer, both of which are very powerful developer tools for the Mac and iOS platforms. This very simple ScreenSaver is the product of about 20mins work playing with Quartz Composer.
The scene shown by my webcam wasn’t very interesting but it gives you the idea of its capability, when loaded as a full screensaver, it also shows the time in various locations. Any feedback is welcome, I’m still just playing with the software, and any thing you would like to see improved or changed, drop me a comment and I’ll see what I can do.
Installation and System Requirements
Installation is very simple process, consisting of copying the 3D Webcam.qtz file from the zip to “MAC-HARD-DRIVE/System/Library/Screen Savers”. Once the file has copied, go to the ScreenSavers menu in System Preferences, and choose “3D Webcam” and Enjoy.
This ScreenSaver has only been tested on a MacBook Pro running 10.6.6, however it should run on any Mac running 10.5.1+. Please note, running this ScreenSaver on battery power, will drain the batteries quite fast (approx. 1hour continuos)
Download
3D Webcam ScreenSaver 1.0.0 Mac
UPDATE:
Version 2 is up – This version is only a minor update with a couple of improvements:
- The cube is now slightly smaller
- The cube now rotates slightly slower
- The cube now also moves around the screen, preventing black screen burn.


